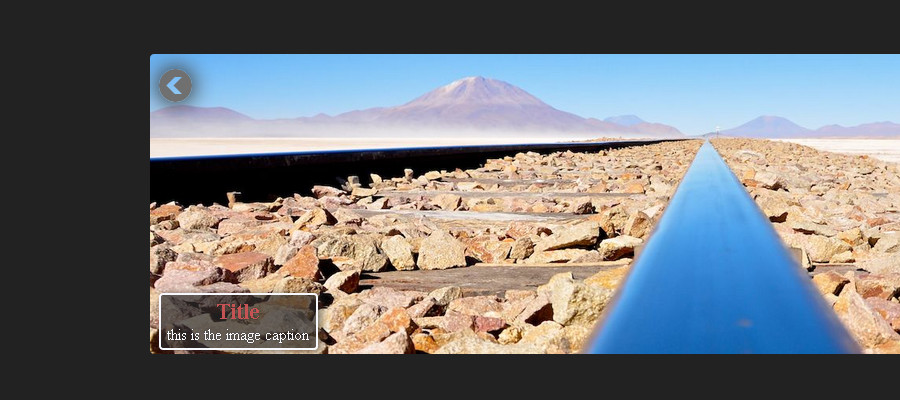
Slideshow with Title and Caption on Drupal
This tutorial was tested only on Drupal 7 with Views 3 and a forked version of Responsly.js
What you'll learn:
- Theming Views.
- Rewriting the output of a field using replacement patterns.
- Implementing an external library into Views.

Requirements:
- Views 3.
- A Slideshow library (Although you can use any slideshow that
you may like, I suggest you to use a slideshow that allow you
to place the caption next to the image wrapped by a container,
if not this tutorial won't help you properly).
- you should know some basics of HTML and Javascript.
What we are looking for
We are going to implement a slideshow using views, I used a forked version of Responsly.js, but you can use any slideshow as long as the caption could be next to the image, the slideshow that we are going to use in this tutorial needs this structure:
<div id="slideshow">
  <figure>
    <img src="image.jpg">
    <figcaption> … caption ...</figcaption>
  </figure>
  <figure>
    <img src="image.jpg">
    <figcaption>... caption …</figcaption>
  </figure>
  <!-- … and so on ... -->
</div>
In order to make the view look like this, we will rewrite the result of some fields as well as theming the output of the view to format each row and the container of the slideshow, we are going to proceed the following way:
Creating the View
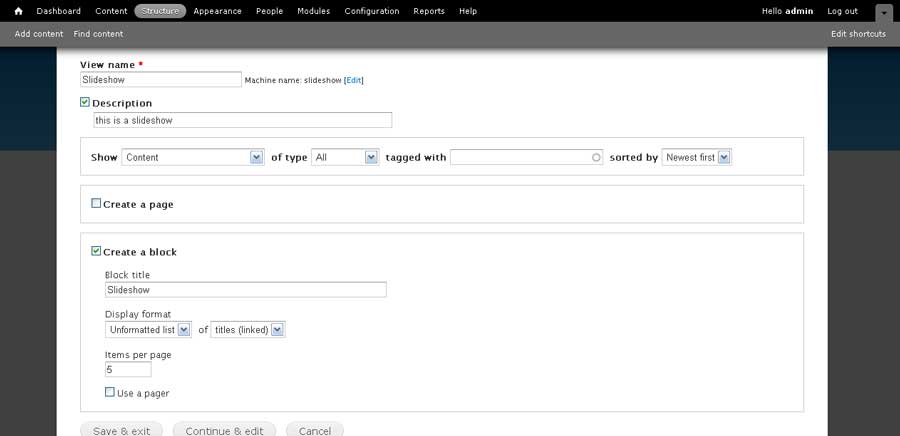
- Create a new view as a block with an “unformatted list” format.
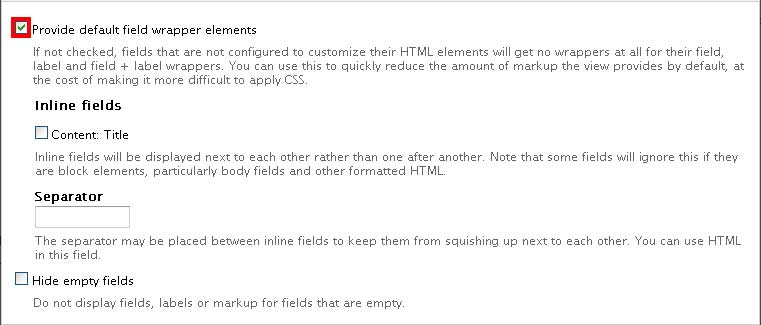
- Uncheck all the options in the format settings (this is optional, the slideshow will work with these options enabled but I would do it anyway).
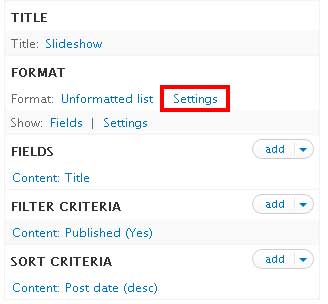
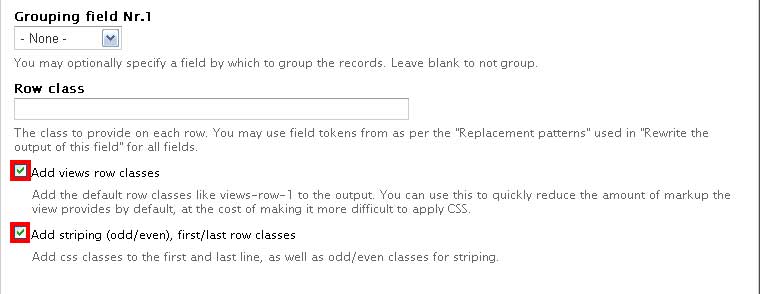
- Make sure the view is showing fields and uncheck the options in the field settings (this is optional too, but I would do it anyway).
Adding the Fields
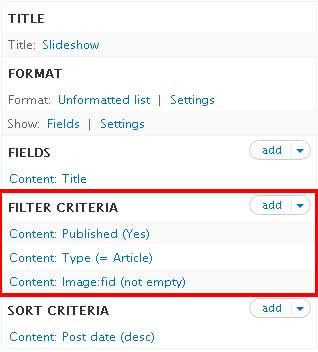
- Apply the proper filters.
-
Add the “content: title” field (mostly defined by default, if it is not defined, please do it).
-
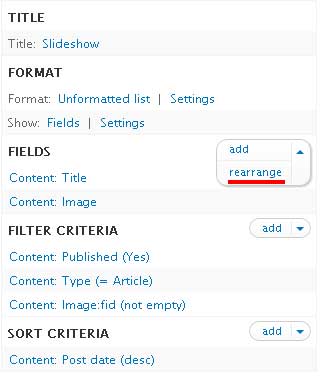
Add the image field related with the filters (if applied). Define the settings without label. Arrange the fields and place it first.
- Add the body field and edit the settings. Define the formatter as “summary or trimmed”. Uncheck the “create title” option. Check the option “exclude from display”. Arrange the fields and place it before the title.

-
Add the path field. Edit the settings. Uncheck the “create title” option. Check the option “exclude from display” and arrange the fields and place it before the title.
-
Edit the settings of the title field. Uncheck the “link to original content” option. Check the “Rewrite the output of this field” option. Use the replacement pattern to format the caption of each image.

This must be defined with html, this is a sample code to integrate this list to the Responsly.js Slideshow;
<figcaption>
  <a href="[path]"><h2>[title]</h2></a>
  [body]
</figcaption>
Theming the view to implement the slideshow
- Theme the output to format each row, in this list that we have created, each row has an image and its caption, we have formatted its caption already (the title field with the rewrite option), but we must format each row and the container itself. In order to theme the output of each row, we must create a template in the template folder of our theme with the theme information that Views module supply.
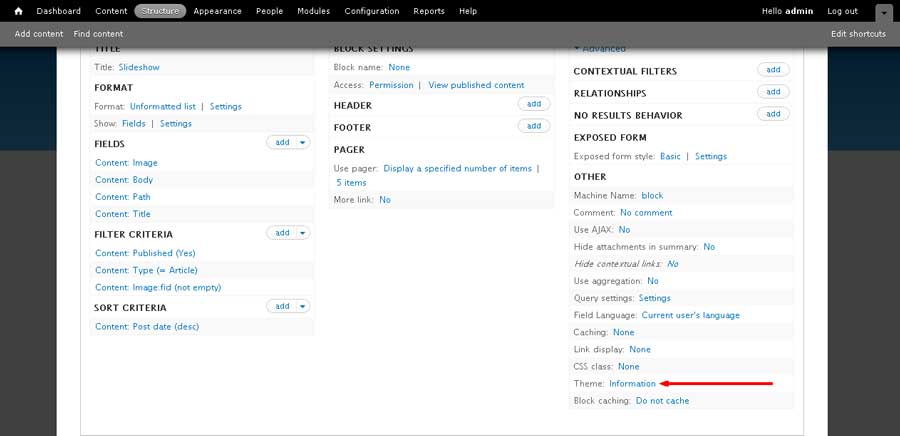
This theme information list all the templates per section (the view container, rows, fields and some others), each section has a group of templates that can be used to theme the view as it needed, each section has a template precedence, the last template available to the right will be considered as the active template overriding the rest of the templates (all the templates to its left), the active template is the one marked with bold style, by default, the very first template to the left is the active (in case that there are no templates available). Each section has a link that shows the code that will be used to create the template, we must copy this code to a new file and name it as the template that we would like to create, we are looking to theme each row of the views (not its fields), so we are going to get the code of the “style output”, create a file with it, place it in the template folder of your theme and name it as the template next to the active template in order to override it.

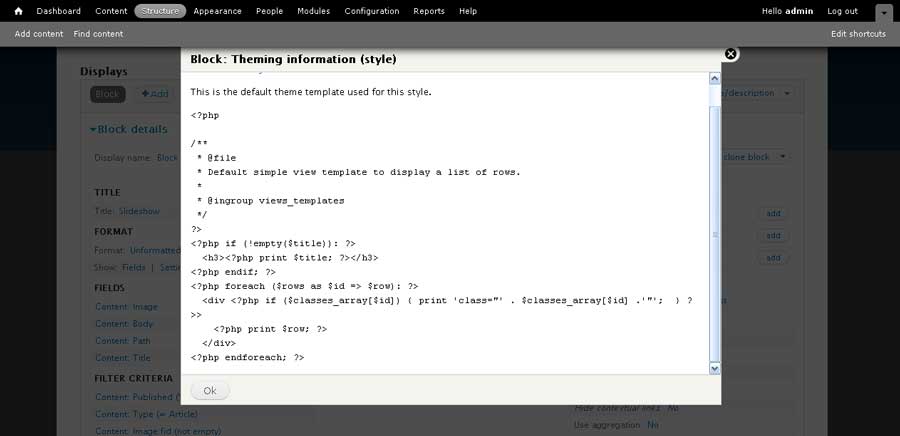
This would override each row of the view that we are creating (not other views, for more information see template (theme hook) suggestions). The changes that we are going to apply is displaying “figure elements (<figure>)” instead of “div elements (<div>)” for each row, so we are going to change this.
<?php foreach ($rows as $id => $row): ?>
  <div <?php if ($classes_array[$id]) { print 'class="' . $classes_array[$id] .'"';  } ?>>
    <?php print $row; ?>
  </div>
<?php endforeach; ?>
Into this.
<?php foreach ($rows as $id => $row): ?>
  <figure <?php if ($classes_array[$id]) { print 'class="' . $classes_array[$id] .'"';  } ?>>
    <?php print $row; ?>
  </figure>
<?php endforeach; ?>
Once the template is done, rescan the templates in the theme information, check the templates of your theme and make sure the active template is the template you have created.
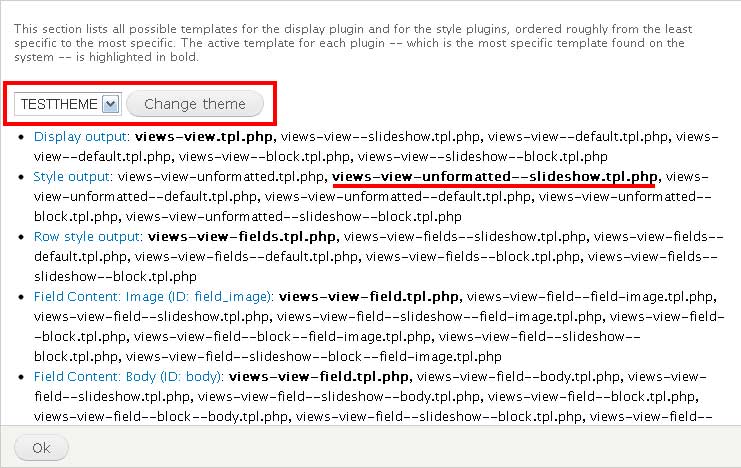
- Theme the output to format the container of the slideshow; we have to repeat the same process but this time we have to get the code of the “display output”, make a file in the template folder of the theme and name it as the template next to the active template.

In this template we are going to define the slideshow, we just have to set an id to the container of the rows, so we would add the id in this piece of code.
<?php if ($rows): ?>
<div id=”slideshow” class="view-content">
<?php print $rows; ?>
</div>
<?php elseif ($empty): ?>
<div id=”slideshow” class="view-empty">
<?php print $empty; ?>
</div>
<?php endif; ?>
Additionally, we must add the JavaScript and CSS code that the slideshow requires to work, this code would be added at the final of the template.
<?php // these are the CSS files ?>
<?php drupal_add_css('path_to/Responsly.js/slidy/theme.default.css'); ?>
<?php drupal_add_css('path_to/Responsly.js/slidy/slidy.css'); ?>
<?php // these are the js files ?>
<?php drupal_add_js('path_to/Responsly.js/slidy/slidy.js', array('type' => 'file', 'scope' => 'footer', 'weight' => 1)); ?>
<?php drupal_add_js('jQuery(document).ready(function () { jQuery("#slideshow").slidy(); });', array('type' => 'inline', 'scope' => 'footer', 'weight' => 2)); ?>
Once done, we must rescan the templates of the view, assign the block to a visible page and see the slideshow work.
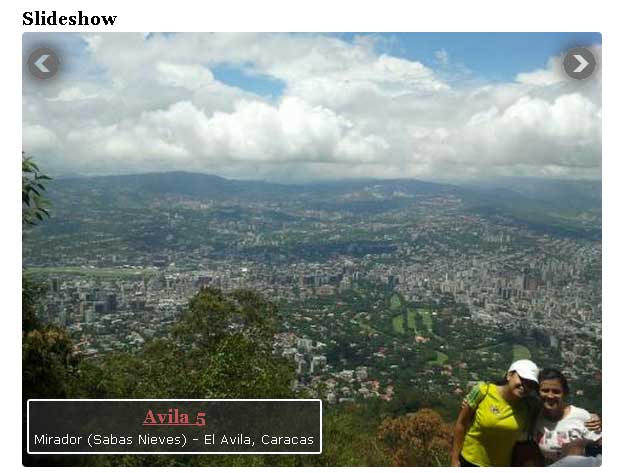
Remember to clear the cache or run the cron if nothing has changed, to check the path of the css and js files, to check if the version of the slideshow it is the last version of the slideshow (just in case that you have used the slideshow that we used in this tutorial), to check if you have added the templates to the right theme, generally, just remember testing -_-”.